Easter DIY // Origami Egg Holders
04/04/2015 12:30
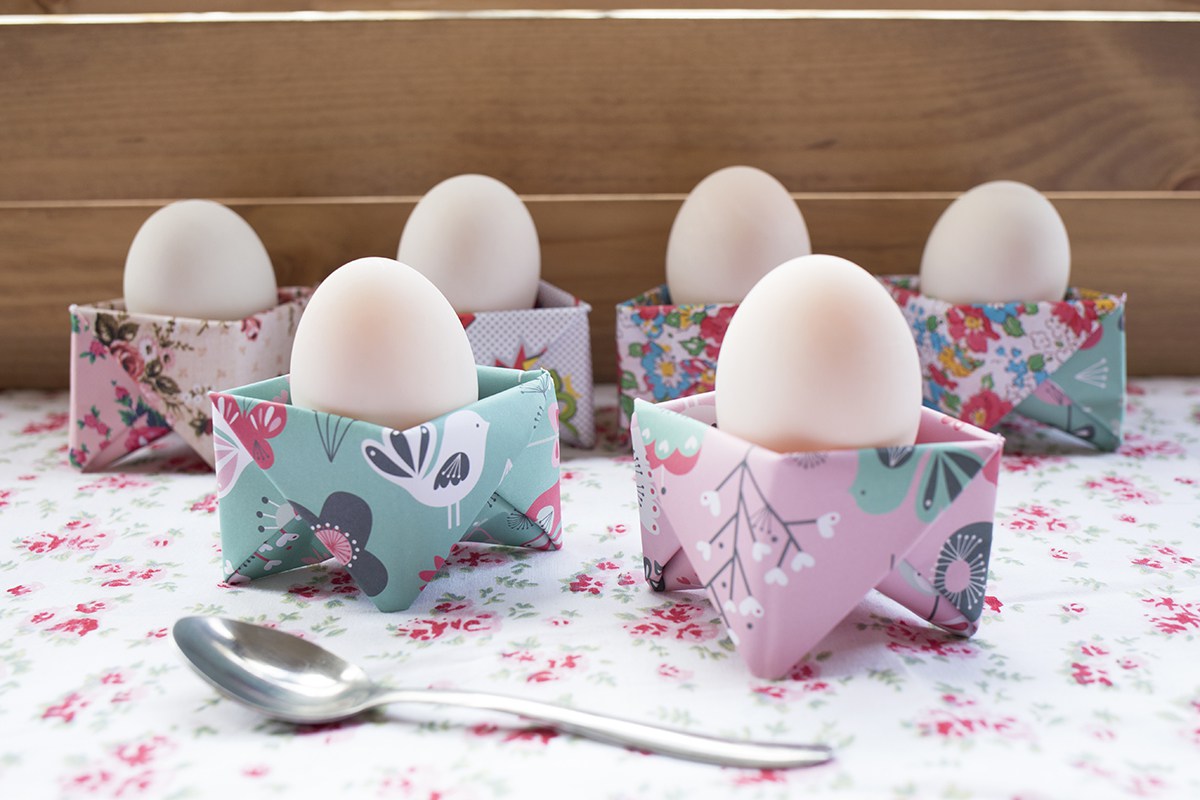
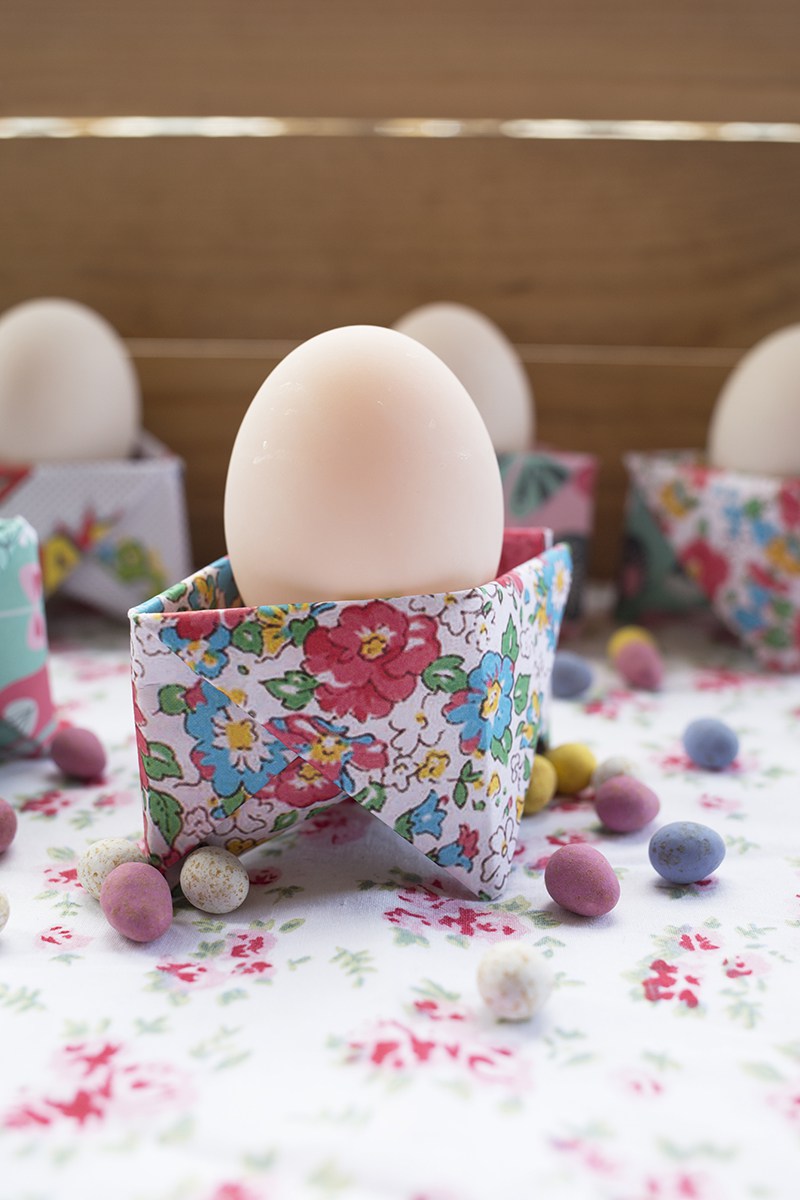
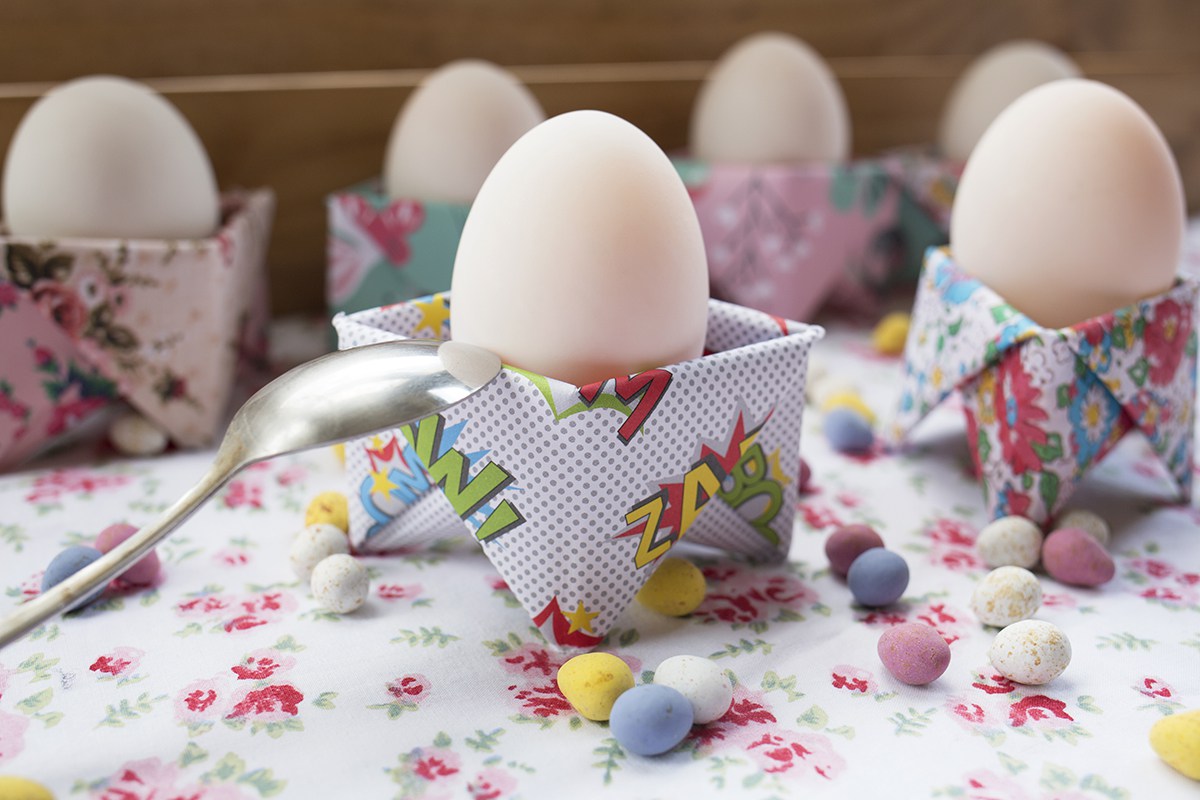
This is the final Easter DIY of the series. We hope that you’ve enjoyed following them as much as we did creating them! It’s ORIGAMI time!! The perfect activity on a rainy day or on Easter Sunday. Also on an evening or with kids, and even with a glass of wine… well! Just the perfect activity right? For Easter we prepared these unique paper egg holders! Sass & Belle offers a pretty selection of wrapping paper which are perfect for this DIY.
You will need
- Paper cut square (we used 20cm x 20cm)
- Eggs or chocolate eggs.
Steps
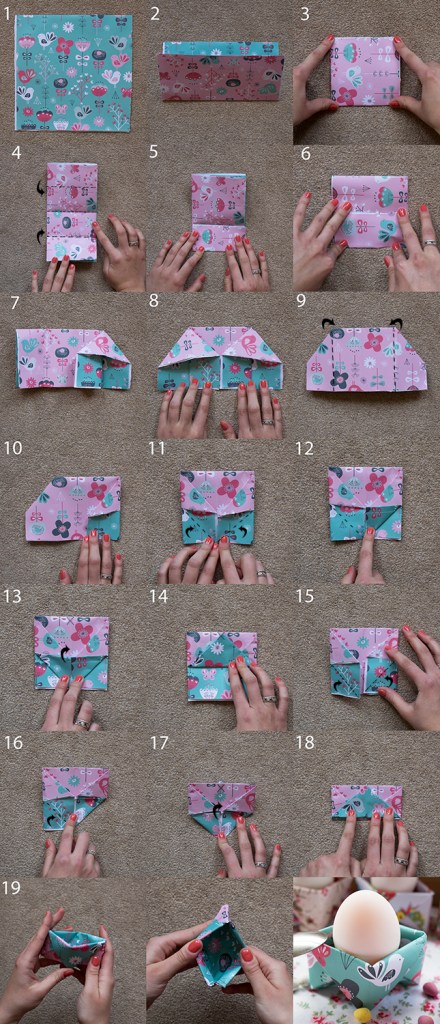
- Cut your paper square. We recommend using a double sided paper for a better look as a result (or you can glue two sheets together like we did).
- Fold in half.
- Fold again to make a square.
- Now if you open your ‘square’ up, you should see a crease in the middle.
- Bring each corner to the middle crease, creating a total of 4 visible creases.
- Both corners should join at the middle crease.
- Open up again to half of the original square and lay horizontally. Slide your thumb in the folds and push up upwards.
- Do the same on the other side and make sure to press the creases flat.
- Turn your origami over.
- Fold the wings to the middle, making a square.
- Fold the corners up.
- Repeat on the other side. This should create a tip.
- Bring that tip to the top.
- Flatten the crease.
- Turn around and do the same again on the other side.
- Fold the corners up.
- Bring the tip created to the top.
- You should be left with a rectangular.
- That’s it! Now squeeze the sides of it and push the bottom up.

Back to Article List
Tags
- Chukka Umunna (1)
- Behind the Scenes (5)
- Cake (10)
- Gift Guide (5)
- Father's Day (2)
- Cactus (1)
- Decorate (9)
- Home (11)
- Inspire (4)
- Homeware (15)
- Colourful Cactus Collection (1)
- Tropical Summer Collection (1)
- Playlist (3)
- Music (1)
- Summer (4)
- Make (11)
- Cocktails (1)
- Bake (17)
- Charity (3)
- NDCS (1)
- Celebrate (14)
- Travel Diaries (5)
- Explore (6)
- Spring (7)
- Nail Art (1)
- Flowers (3)
- DIY (17)
- Trends (2)
- Healthy Baking (1)
- Easter (8)
- Mother's Day (2)
- Free Printable Artwork (1)
- Healthy (1)
- Pancake Day (1)
- Weekend (1)
- Brighton (1)
- Things To Do (3)
- New Year (2)
- 2016 (1)
- Things To Love (1)
- Christmas (16)
- Styling (5)
- Things We Love (2)
- Quiz (2)
- Video (1)
- Copper (1)
- Autumn (7)
- Pumpkin (2)
- Pumpkins (3)
- Halloween (6)
- Collection (1)
- Happy Animals (1)
- How To (2)
- Interiors (1)
- GBBO (4)
- Recipe (2)
- Back to School (1)
- Home Decor (11)
- Culture (3)
- Sass & Belle (4)
- Stationery (3)
- Enjoy (1)
- Owl (1)
- Quotes (1)
- Wedding (4)
- Upcycle (3)
- Wimbledon (1)
- Mascots (1)
- Dogs (1)
- Environment (1)
- YouTubers (1)
- Bloggers (2)
- What's In Your Bag (1)
- Valentine's Day (1)
- Wildflower (1)
- Flower (1)
- Gifts (7)
- Rosemary Christmas Wreaths (1)
- shops (1)
- collections (1)
- War Child UK (1)
- Syrian feast (1)
- Kawaii (1)
- Japan (1)
- nursery (2)
- decor (5)
- tips (1)
- decorating (4)
- children (1)
- parenting (2)
- nesting (1)
- interior design (2)
- style (1)
- mum (2)
- nursery room (1)
- tiles (1)
- patterns (1)
- decorating tips (1)
- tiles direct (1)
- sass and belle (3)
- home design (1)
- bedside table (1)
- bedroom (1)
- inspiration (3)
- instagram (1)
- gift (1)
- giftware (2)
- winter (2)
- cushions (1)
- lunch bags (1)
- unicorns (3)
- botanical (3)
- mermaid (1)
- mermaids (1)
- nurseries (1)
- decorations (1)
- spooky (1)
- black cat (1)
- party (2)
- no-carve (1)
- design (2)
- seasonal fun (1)
- halloween fun (1)
- fun (2)
- home decor inspo (1)
- plants (2)
- nature (1)
- outdoors in (1)
- outside in (1)
- home decor trend (1)
- organisation (2)
- christmas time (1)
- xmas (1)
- xmas preparation (1)
- christmas preparation (1)
- family (1)
- Gifting (1)
- Festive (1)
- Stocking Stuffers (1)
- Stocking fillers (1)
- personalised gifts (1)
- gifts for kids (1)
- gifts for animal lovers (1)
- secret santa (1)
- Christmas Gifts (1)
- Gifts for her (4)
- Gifts for him (2)
- War Child (2)
- giving (1)
- December (1)
- Campaign (1)
- gift wrap (1)
- creative (2)
- crafts (3)
- arts and crafts (5)
- wildflowers (1)
- metallics (2)
- monochrome (2)
- luxury (1)
- llama (1)
- colourful (1)
- wrapping (1)
- new years eve (1)
- 2018 (1)
- photobooth (1)
- unicorn (2)
- metallic (1)
- photography (1)
- party ideas (1)
- designer (2)
- profile (1)
- meet (1)
- art (2)
- valentines (1)
- valentines day (1)
- love (1)
- gift ideas (2)
- couples (1)
- marriage (1)
- newlyweds (1)
- bullet journal (1)
- bullet journalling (1)
- sketchbook (1)
- doodles (1)
- get organised (1)
- to do list (1)
- planner (1)
- Pinterest (1)
- patches and pins (1)
- BTS (1)
- behind-the-scenes (1)
- product design (1)
- denim (1)
- fashion accessories (1)
- fashion (1)
- accessories (1)
- mothers day (1)
- mums (1)
- gifts for mum (1)
- pastel cactus (1)
- pastels (1)
- garden birds (1)
- birds themed (1)
- bird gifts (1)
- cactus gifts (1)
- gold (1)
- baking gifts (1)
- baking (1)
- blue willow (1)
- floral (1)
- DIY home (1)
- home decorations (2)
- decoration (1)
- yarn (1)
- yarn crafts (1)
- DIY craft (1)
- pom pom (1)
- pom pom garland (1)
- DIY pom pom (1)
- Snow Day (1)
- snow (1)
- snow fun (1)
- christmas decorations (1)
- christmas fun (1)
- craft month (1)
- springtime (1)
- spring crafts (1)
- spring activities (1)
- easter time (1)
- easter bunny (1)
- Easter party (1)
- Easter activities (1)
- crafts for kids (1)
- unicorn crafts (1)
- party hats (1)
- kids room (1)
- Money Boxes (1)
- Kids Home (1)
- interior decor (1)
- home trends (1)
- Summer Holidays (1)
- Travel Tips (1)
- Scandi Boho (1)
- Hygge (1)
Latest Posts
- Bohemian Chic - 5 ways to achieve this latest interior trend
- How To: Succesfully pull off natural style in your home
- 10 Travel Tips: Make this summer the best one yet!
- Guest Post: Transform Your Home Interior
- 5 Tips: Teach Children to Save
- Make Your House a Home
- Spring Crafts Round-Up
- Spring for Change X War Child
- A Very Sass & Belle Snow Day!
- DIY Home: Pom Pom Garland!


